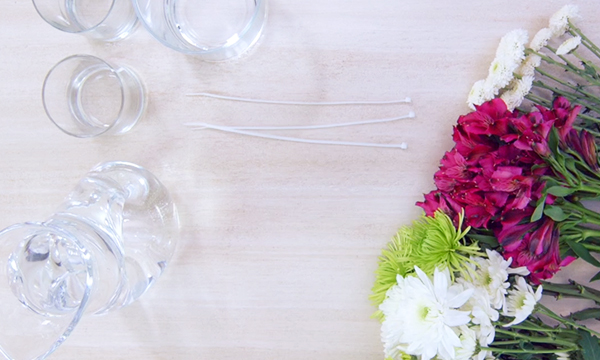
There’s nothing more relaxing and rewarding than arranging your own delivery of flowers just how you want it– even if it means dividing up a huge bouquet of flowers into a few small bouquets. Instead of buying a bunch of different arrangements for different spaces in your home, tap into your inner florist by using one bouquet to create super cute and smaller arrangements. This is ideal for apartments or smaller living spaces.
Many standard bouquets already include 10-14 stems of various flowers. Take it apart and make it work for your own design needs. Don’t limit that one bouquet, to one area of your home. Take it apart and spread the sunshine. With just 4 quick steps and materials already in your kitchen drawers, you can decorate your nightstand, coffee table or kitchen counter. All you need are 3 small glass vases, jars or recycled candle containers, sharp garden scissors and few twist ties. Here’s how to divide and conquer one large bouquet of wildflowers to fill multiple spaces in your home.
Flowers Used in this Arrangement:
- White daisies
- White cushions
- Pink roses
- Yellow lilies
- Buttons and green Fujis

Step 1: Lay out your flowers
Here we have more white daisies and white cushions, than pink roses, yellow lilies, buttons and green Fujis. Make three piles for light medium (yellow hues) and darker color flowers. Remove any extra petals from every stem below the water line. Remember, those extra petals spoil the water and wilt your flowers faster.
Step 2: Prep Your Bouquet
Pour about 2-3 cups full of water in each vase. The amount of water will be determined by the size of your vases. Sprinkle plant food in each vase. If you don’t have plant food, you can use a squeeze of lemon juice and cap full of white vinegar.
Step 3: Divide and Conquer
Next, prep your flower arrangements. Start with the lighter color flowers for the first arrangement. Take about 6 to 8 daisies and crisscross the stems on top of each other, spreading them out like a fan. This is called the spiral technique. You will use this often as you start to develop your own florist sensibilities. It helps to rotate the bouquet in your hand as you add flowers. Keep your hand relax and trust your intuition. Add the white cushions and pompons to the left or right side of the bunch, whichever you prefer. The thickness of your bouquet will depend on the width of your vase.
Step 4: Hold it together
Use a few plastic twist ties to hold your first full bouquet and its design in place. After you tie your flowers together, it’s easier to evenly cut the stems. Take you time to cut each stem so they are all the same length and they fit in each vase.

Step 5: Vase Ready
Place your beautiful floral creation in water and adjust the bouquet. Whatever looks and feels good is probably a great position for your bouquet once you place it in its new home.
Step 6: Get Dramatic
For the second vase, bunch the darker color flowers together for a more dramatic mood. Add in extra stems like Fujis to give your design a more full body. In this video, you will see that a little extra space is needed to help your bouquets stand on its own.
Step 7: Last But Not Least
For the last arrangement, gather the extra cushions and Fujis (about 2-4 leftover stems) into a small bouquet and place in your smallest vase. Remember to use the spiral technique so that each bouquet is formed evenly. Position your bouquets on your favorite surfaces, like your bedside, a coffee table or your bathroom vanity and Enjoy!

